Monday, November 9, 2015

Top Top Coats! A Comparison of Seche Vite, HK Girl, Poshe, and others

Today I wanted to review top coats. I paint my nails often, and a good top coat is a must. I have tried a lot of top coats, mostly low-end drugstore/mass market available ones and most are meh. Some that I have tried include Essence Gel Look top coat, Sally Hansen Gel Shine 3D top coat, NYC In a Minute Quick Dry in Grand Central Station 202, and Sally Hansen Insta-Dri Anti Chip top coat. There's nothing worse than painstakingly trying to do a good job staying within the lines only to have your mani ruined because you had to unzip your pants or tie up your hair - why do I always need to pee 5 minutes after I paint my nails?? For me, the most important characteristic in a top coat is the drying time. Cuz if I'm not hitting the bathroom after painting my nails, I'm trying to rip open a bag of chips...uhm...ok maybe that's just me. Anyway, I need my nails rock hard fast. The shiny factor would be second, and third, longevity.

On to the top coats! I'm going to discuss 4 top coats that each promise quick drying results and high shine. Two are relatively mainstream, and the other two are more obscure and a little harder to obtain.


Seche Vite - $5-10, 0.5fl oz., found at most drugstores, Target, Walmart, and many online retailers


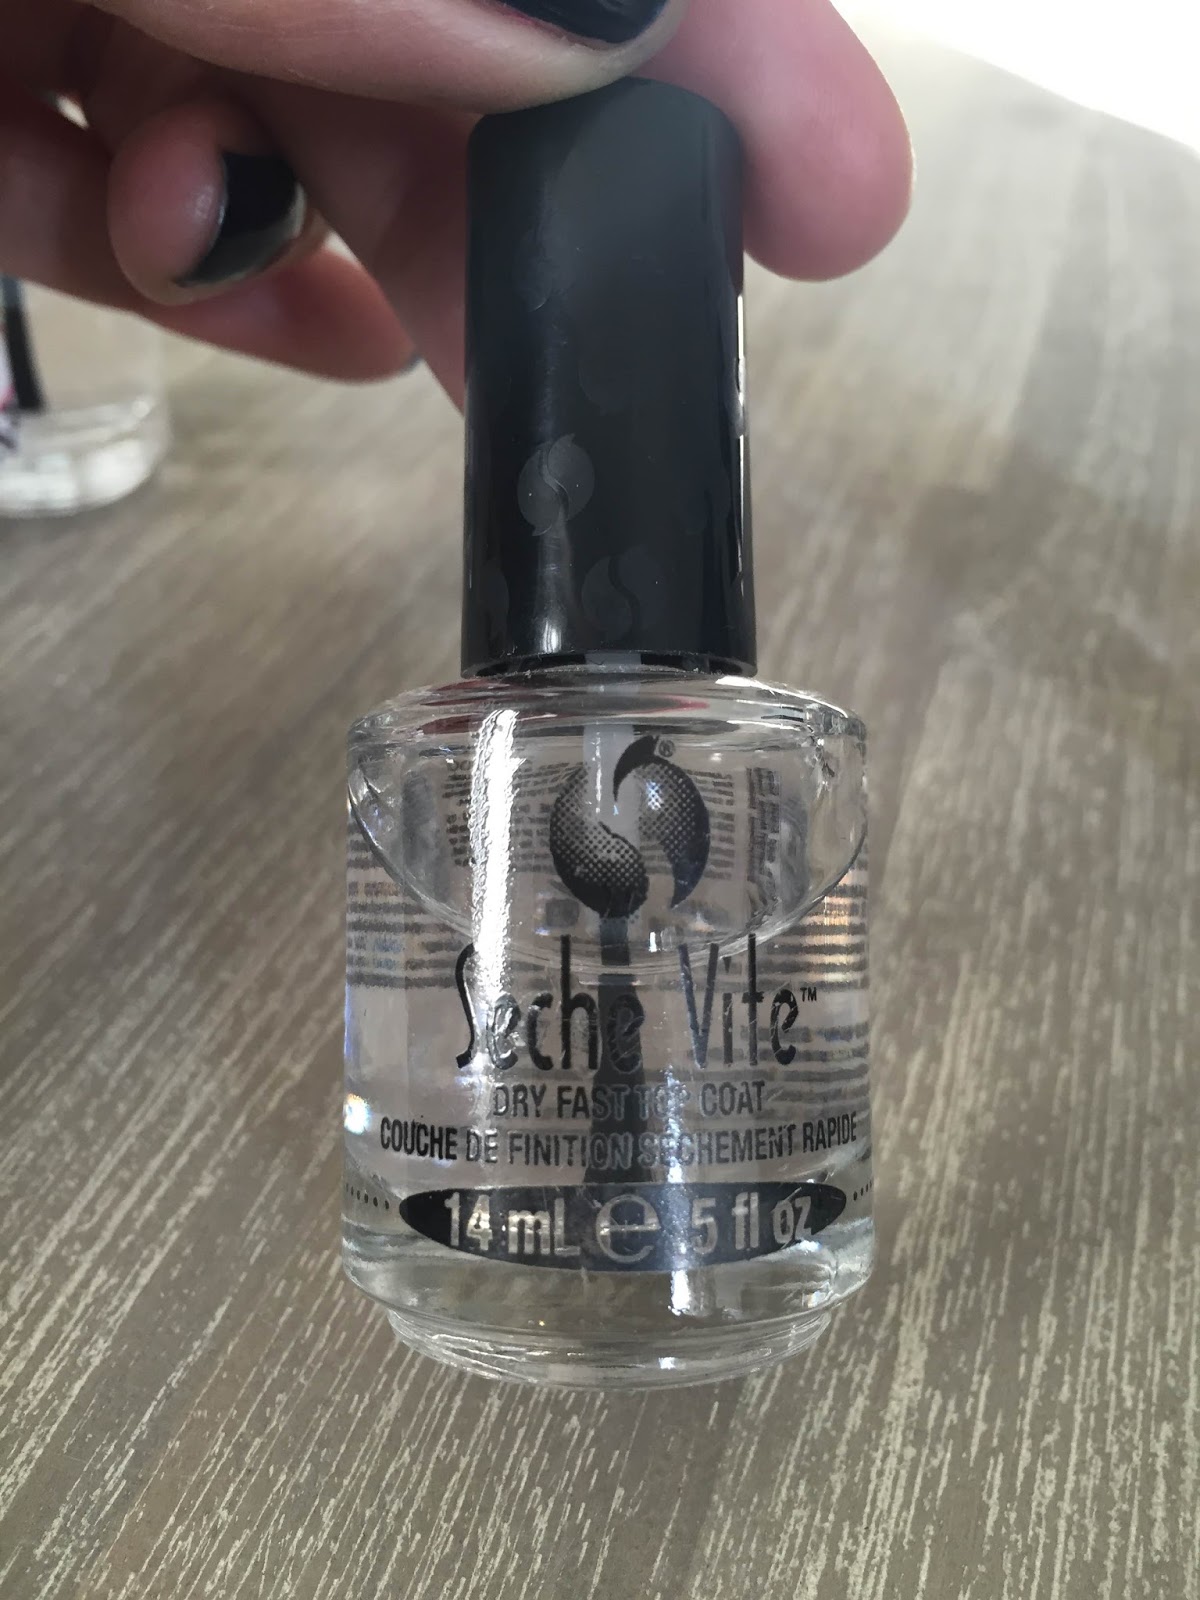
Probably the most well-known and most well-loved of the bunch. Seche Vite is a cult product for good reason. It dries nails in less than a minute to a beautiful glossy finish. It has a strong chemical odor that dissipates once dried. Some complain about 'shrinkage' which I would tend to agree with after a day or two. Longevity is mediocre. I probably get 2-3 days of wear before chipping or shrinkage occur. Another major complaint is that Seche Vite gets thick and gloopy halfway through the bottle, rendering the second half unusable unless you thin it out (Seche Vite makes a thinning product expressly for this purpose.) I would say I can get down to maybe 2/3 of the bottle before I run into this problem and end up tossing the rest out.

Out the Door - $5, 0.5fl oz., found at CVS, Walgreens, other online retailers


OTD is another popular top coat. For whatever reason the bottle I own is a clear yellowish liquid rather than completely clear. Not sure if that impacts its performance.   It does not have a strong odor, but this definitely takes longer (2-3 minutes) to dry my nails than with Seche Vite. OTD gives a glossier finish. Because of these factors, what I end up doing is do applying Seche Vite after my polish, to dry it instantly, and then go over it with OTD to give it a shinier finish. My nails stay nice and glossy for 4-5 days with OTD, but again, chipping and wear show by this time as well since I don't tend to use OTD solo.


HK Girl -$6.99, 0.5 fl oz., found exclusively on glistenandglow.com


This is a newer top coat to me, and I found it by way of a YouTuber I follow on Instagram who always has the nicest nails. This top coat is harder to find since you can only order it online from the above website.

This is what their site says:
"Glisten & Glow HK Girl (2 free) is made from a top coat purchased in bulk from a  nail lacquer manufacturer and our own blend of propriety ingredients. 2 Free version - Product Ingredients: Butyl Acetate, Ethyl Acetate, Nitrocellulose, polyster resin, dibutyl phthalate, Bentone, Isopropyl Alcohol, camphor, octocrylene and isopropyl"

This top coat is very similar to Seche Vite - it also has a strong chemical odor, but drying time is verrrry similar, though I still think Seche Vite outperforms HKG in this regard. I would say this top coat edges out SV with shininess and longevity (maybe 3-4 days of wear with no chips). It is harder to obtain, and ends up costing around $9.50 ($2.50 for shipping), so it is more expensive than the other two products I've mentioned. I do like this top coat, so would consider re-purchasing once I run out.

Poshe Super Fast Drying Top Coat - $5-$7.69, 0.5fl oz., found at various online retailers, and Sally's Beauty Supply


I came across this top coat after reading about it on several blogs touting its capabilities and similarities to Seche Vite.

The Poshe website claims:
"All Poshé nail care products are DBP, Toluene and Formaldehyde free."

This product is incredibly similar to the HKG and SV top coats. It dries nails in about a minute and also gives a beautiful glossy finish. One difference and nice detail is that the brush with Poshe is thicker and more paddle like than the other three (more traditional) brushes. It's easy to obtain from Amazon, shipping is fast (I have Amazon Prime), and longevity is about 4 days before I see chips. I don't notice any shrinkage with this nor the HKG.

Overall Thoughts - Of the 4 top coats I've mentioned, SV, HKG, and Poshe are all very comparable. All three dry nails right quick, and give pretty shiny finishes. Out the Door does not dry as quickly, so I do not really use it for that purpose. I would say HKG and Poshe probably outperform SV since they give a shinier finish and don't have the shrinkage issue. SV is readily available though so if I was in a bind and ran out of the others, I would not hesitate to pick it up. I would probably also repurchase Poshe since it is easy to get and cheaper than HKG.

What are your thoughts? What are your favorite Top Coats??

Monday, May 4, 2015

Beginner's Guide to Traveling to Japan - Part 1

Hi Everyone! It's my first travel post! I have been meaning to blog about some of my recent travels, but laziness and a busy schedule seem to get in the way...

Anyway, let's talk about Japan! I just returned from a 2 week trip to Japan, specifically Tokyo, Kyoto, and Hakone, with a brief trip to Kobe. It was my first time there, and it was ahh-mazing! Look at some of these beautiful sights!


Meiji Shrine, Tokyo


Tsujiki Fish Market, Tokyo

So many beautiful flowers...

Tsukemen Ramen

Cherry Blossoms

Sensoji Shrine, Asakusa

Fushimi-Inari-taisha Shrine, Kyoto

Shinjuku Gyoen, Tokyo
Let's start with Travel Tips:
1. Moola - We converted USD to Yen at our local bank before we left. We also brought extra US cash to convert there in the event we were to run out. Japan is largely a cash-based society, and many places do not accept credit card. Notable exceptions would be their many (huuuuge) department stores, major drugstores (oh so much to see and buy there!), hotels, and some random restaurants and shops. The exchange rates were similar. You can exchange cash at the airport (we flew into Narita Airport), at banks ,and apparently at ATMs in some 7-Eleven's. 


2. Rail Pass/Transportation - Japan has an awesome network of trains, subways, and buses. The best part is that everything runs on time. On - freaking - time!!!! If you show up expecting to catch your train (referring to bullet trains) at the time its listed to depart, you will be late. You must show up early or else you will not make your connections. Trains open their doors to load passengers at least 5-10 minutes prior to the time of departure. And they leave on the minute - or even a minute earlier than scheduled. Delays on high speed trains are very unlikely, so just make sure you set aside enough time to get to your trains. 


a) Between cities - Japan is connected by a dense network of high-speed "Bullet trains" or "Shinkansen". Depending on your itinerary and how many cities you plan to see, buying a rail pass may be super convenient and economical. 


Shinkansen

I won't be able to go into specifics, because the rail system in Japan is very complicated, but basically Japan Rail ("JR") covers most of Japan with high speed trains. They have different divisions depending on which part of Japan you are in (JR East, JR West, etc), and you can only use the pass on JR trains and buses (with some exceptions). There is a special JR Pass which you can purchase and must purchase ahead of time (prior to arriving in Japan) which will let you ride most JR trains all through Japan. The Japan Rail website gives detailed instructions on purchasing the pass and its conditions of use. It's actually a very useful resource for planning your travel. As mentioned, you have to buy this pass in advance (online or at a travel agency), and then pick up the physical passes at the JR station when you get there at any JR office. There are different levels of trains (Nozomi, Hikari, Kodama)- the fastest being the Nozomi and Mizuho trains, which the JR pass is ineligible on. However, the non-express trains which you can ride are still super fast - the trains travel anywhere from 160-200mph. The difference between them besides actual operating speed is that the Kodama, for instance, is a local train and has more stops, than say the Hikari, which has less stops. You order the pass up to 3 months prior to use, and they come in 7, 14, or longer day increments. The pass is activated the first time you use it, and is active for the duration of your purchased usage.


b) Traveling in Tokyo - Tokyo deserves its own section simply because like the rest of the country, the subway and bus system in Tokyo is complex. But - don't fret - it's really easy to get around. There are 2 major subway systems in Tokyo, the Tokyo Metro and the Toei Subway. Pretty much all the subway stations in Tokyo have signs in English, so as long as you know which station you want to go to, you will be able to find your way. The best and easiest way to use the subway is buying a Suica or Pasmo card. You can buy a Suica card at any JR ticket office and you can buy a Pasmo card at the airport (at designated Pasmo kiosks), and at many subway/rail stations. They are virtually interchangeable, and they are basically a form of debit card. You pay a small deposit (500 yen) to buy the card, then load as much money on it as you want. It's easily recharged at any Pasmo/Suica kiosk, and then when you use the subway, there's no need to calculate fares. In Japan, fares are usually based on distance traveled, there are electronic gates that you just touch your card to to enter, and touch your card when you exit, and it deducts the appropriate fare. You can also use the card at many convenience stores, and restaurants. We mainly used the Tokyo Metro, and we had the Suica card. If you're traveling with more than one person, it is easiest for each person to have their own card, even though you can technically share the card. The Suica card is valid for 10 years, so if you know you are returning to Japan, you don't have to cash your unused yen up if you don't want to, but if you are cashing it back in, there is a deposit fee of 220 yen to cash out. The best is to use up the card completely, and you still get your 500 yen deposit back, even if the balance on your card is zero. 


c) Traveling in Kyoto - Kyoto Station really deserves its own post, only because it is a huuuuge train station, complete with department stores and several food courts/floors of restaurants and shops. The subway system is not as intricate as Tokyo's, and I would say the main form of travel in Kyoto would be via bus. It's a little trickier getting around in Kyoto because not all the buses have clearly delineated routes, but your JR pass can get you around on some of the trains (the JR trains), and you can buy a 1 or 2 day tourist pass that gives you unlimited travel on buses and two specific subway systems, the Karasuma line and the Tozai line. There are probably 15 other subway lines that run through Kyoto, but the tourist pass is not valid on those lines, and we did not use any of those other subways while we were there. You can see the Kyoto subway map here.


d) Other - We didn't take any taxis, but if you do the driver opens the doors for you automatically, so don't go trying to pull open the doors...apparently they are not impressed when you try to do that. We also visited Hakone, which is a beautiful area close to the base of Mount Fuji, for 2 days, and traveling there is best with the Hakone Free Pass. No, it's not free, but it does allow for unlimited travel for 2 or 3 days duration. 


3. Shopping - Japan, and Tokyo specifically, is brimming with shops and immense department stores full of beautiful, cute, and innovative items. There is a "consumption tax" of 8% charged but many of the large stores there offer "Tax Free shopping" for visitors. Depending on how much you spend and what you purchase, you may be eligible for tax exemption. For example, on the purchase of a consumable item such as food, medicine, or cosmetics, you have to buy at least 5400 yen of goods before you are exempt on paying tax. Non-consumables, like electronics, must be a purchase of at least 10,800 yen. You must show your passport at the time of purchase. Some places have you bring your receipts to a tax redemption office located on the premises (ex in some dept stores), and they will refund you any tax you paid (in cash). 


4. Food and Eating out - Many restaurants, especially most ramen joints, utilize vending machines for order placement. The vending machine is located outside the restaurant, there is a menu, often with pictures and prices, and you are tasked to find your particular choice on the machine. Expect that the vending machines will not have any English, and be prepared to try and match Japanese characters and prices with the appropriate button. 


Put your money in, press the button, and out comes a ticket that you hand to the host/server. You find a seat and shortly thereafter, your food is delivered. Challenging? Yes...but it's kinda fun despite the initial intimidation. The other helpful thing is many restaurants have plastic models depicting the dishes, and most dishes come out looking exactly as they look in the window! 


Your check is usually placed on the table after your food is brought out, and once you are done bring your check to the register to pay. As mentioned in the being on time part in the transportation section, if you have a reservation at a restaurant, go early, not just "on time". Japanese people are very punctual and you could lose your reservation if you show up late. Also note there is no tipping in Japan - in restaurants, bars, taxis, etc. The price is the price is the price. Done. 


5. General Etiquette - Especially in Tokyo, you will find people do things en masse. Go with it, don't fight it people! You stand on the left, and walk up on the right on an escalator. On the stairwells, just follow whatever everyone else is doing. If you're confused look for the signs telling you which way is what. 


See the arrows?

Up...Down. Got it?

Note that there are a lack of trash cans in Tokyo. Don't litter! Persevere. You can usually find a trash or recycling receptacle in train stations but the city is exceptionally clean because people are good about keeping their city that way! Having some hand sanitizer is also very handy as many public restrooms do not have soap. Don't be alarmed that some restrooms have "squatters"...they'll be self explanatory when you see them, and it won't be too hard to figure out how to use them either. 


In case you get confused, the Japanese are very helpful people


Don't worry...most restrooms have some combination of squatters and super fancy electronic toilets. 


6. Conbini or Convenience Stores - While you may be used to shlepping to your local 7-Eleven when you need to get your Slim Jim or Slurpie fix, the 7-Elevens in Japan are an entirely different animal. They are your everyday stores there, convenience to a tee. People routinely buy food, pay bills, and pick up everyday items at "conbinis" such as 7-Eleven, Lawson, and FamilyMart. Don't be shy and try a trio of inari (sweet tofu pockets filled with rice), or onigiri (rice balls/triangles) to start your day off! It's delish and cheap. Pay with your Suica or Pasmo card and you will feel like a real local. 


7. Connectivity - Many areas of Tokyo and Kyoto advertise "free wifi", at hotels, restaurants and even subway stations. However, these may be harder to navigate on your smartphones as most of these sites are in Japanese. The easiest thing is to pre-order a pocket wifi that you can pick up at the Post office at the airport or have sent directly to your hotel. We rented our pocket wifi from this website. There are a variety of companies that offer unlimited data plans and prices vary according to how long you need the device for. It was invaluable for our trip as we used it to get everywhere and look things up on the fly. Google maps is spectacular for getting around as it lists train stations/times etc. Sometimes it shows destinations in Japanese, but for the most part we were able to figure things out. We had our pocket wifi for 11 days and it cost $70 usd. When you are done with it you just drop it off at the post office with a pre-paid envelope that they provide when you pick it up. If you don't want to go that route, buying a SIM card would be an alternative option. But, the pocket wifi was really really great and convenient and small enough to carry in a pocket no matter where you are going. You can also connect up to 10 devices on it, and we had pretty great signal in most places that we went. 


Kabukicho, Tokyo

Nanzenji, Kyoto

Getting our Ryokan on

Beauty by the name of fish
That's enough for one post...More to come. Have you been to Japan? Tell me about your experiences and your tips!

Sunday, March 1, 2015

Some Thoughts On "Holy Grail/Cult Favorites"...

There are a lot of products that are highly raved about on YouTube, and blogs. I have to admit the temptation can be pretty strong when you hear how great a product is and how "life-changing" it can be. I've definitely bought into the hype, and I wanted to discuss a few of these hyped products and my thoughts on them. These are just some of the products that I've tried...I won't be able to discuss all said cult faves in this one post, but I'll pick and choose a few and go from there...(pictures to come!!)

And so we begin...

Kat Von D Tattoo Liner in Trooper ($19usd on Sephora, 0.02 oz)


I was never a liquid liner girl until more recently. Chalk it up to an unsteady hand, a crepey eyelid, lack of practice...I was not the biggest fan. This Christmas I was lucky enough to be gifted with a limited edition Sephora eyeliner set which included this well-loved liner. People love it for its staying power, brush tip applicator, and inky black pigmentation. I have to say this is a solid liquid eyeliner. The flexible brush tip is not hard to wield after a few uses, and its fine tip allows for precision even on my as mentioned crepey eyelid (I do pull my eyelid taut to apply, I know people say you shouldn't do this, but I find I just need to!). The formula definitely has great pigmentation, however, it's not a matte black. Maybe it's my oily eyelids, but I know the "un-matteness' of this liner is accentuated several hours after application when it is noticeably "shinier" on my lid. I don't wear eyelid primer or eyeshadow on the regular, so perhaps this would help with that. At $19 a pop, it's definitely pricey. A more affordable drugstore option I also really like is the Physicians Formula 2-in-1 Lash Boosting Eyeliner. This retails for $10.95 on the Physicians Formula website for 0.016 oz, which is slightly less product but at about half the cost. The brush tip on this eyeliner is slightly finer, but the staying power of the Kat Von D liner is far superior in comparison.

Mac Fix + ($22usd on Maccosmetics.com, 3.4 fl oz)


This product has been around for a long time and is highly touted by makeup artists and home make-up users alike. It's claim to fame is that it "refreshes the skin and finishes makeup". Many use it as a final step to take away powdery-ness after setting with, duh, powder. I'm mixed about this product though I have used it enough to repurchase. While a few spritzes definitely removes that "powdery" look, sometimes I feel this leaves an unnatural look to the face that makes it more obvious that I'm wearing makeup. I would liken Fix+ to  a finishing hairspray for your face...it seems to help lock things into place, but to me, the overall finish can come across a bit "plastic" such that uneven texture can be accentuated. I have an Evian facial spray that I sometimes use to give that similar dewy type look. It give a finer mist but it doesn't prolong the staying power of my makeup (since it's basically just water) that I think Fix+ does.

Smith's Rosebud Salve ($6usd on Sephora, 0.8 oz)


Now this is a more reasonably priced item that does not break the bank. Many find this balm to be a cure-all for dry, chapped lips but personally, I did not really like this and would not purchase it again. A generous amount comes in the tin, but with some use, the edges of the tin get gummed up with product and makes the tin incredibly hard to open. The product itself is like a more slick version of Vaseline. It feels slippery on the lips, but I felt like it sat on top of my lips and did not penetrate at all. As a result, it gives your lips a super glossy look, but there was absolutely no lasting moisturizing effect. Also, I was not a huge fan of the rose scent, though mild.

Fresh Sugar Lip Treatment ($22.50usd on Sephora, 0.15 oz)


Since we're on the topic of lips, let's talk about this cult favorite. It's a pricey lip balm, that they deem a "treatment". I don't really know what would set this apart as a "treatment" but aren't all balms considered a lip treatment if you want to get technical? Anyway, this treatment comes in an array of tints, and definitely gives the lips a nice moisturized feel. The packaging is nice - it comes in a weighty metal bullet - and I have repurchased this a few times. I would say the staying power of this balm is not the best, and there is a slight scent/taste to this product that I'm not crazy about. Personally I do not have a "holy grail" lip balm, but I do like this product for its feel and it leaves your lips nicely tinted. It's definitely overpriced though, in my opinion.

Beauty Blender ($19.95usd on skinstore.com)


Oh the Beauty Blender...this is perhaps the most highly raved about beauty tool there is on the market...close contenders perhaps the Shu Uemura eyelash curler, and flattop kabuki brush. This magical teardrop shaped sponge is first rinsed under warm water and then used to apply liquid foundation to give a seamless finish. I have owned several beauty blenders and it is probably my favorite tool for applying (most) foundations. The wet sponge sheers out most formulations so is best used with thicker foundations. I usually dot my foundation across my face and then bounce my Beauty Blender to blend it out. Its shape allows for blending in undereye concealer and even cream highlighter nicely as well. It is harder to build coverage though, and if I need more coverage in certain spots, I'll usually tap the product in with my finger rather than going over it with the Beauty Blender. I will also apply foundation with my flat top Kabuki brush for fuller coverage and then go over certain areas of my face (areas that I have more issues with pores/texture) like my forehead and sides of my nose with a damp Beauty Blender to give a more natural finish. I have tried the Real Techniques Miracle Complexion Sponge which is less than half the price, and for those on a budget, this is a great dupe, though I still prefer the real deal.  I haven't tried the liquid or solid Beauty Blender branded cleansers, but I find it cleans perfectly well with any soap bar - just choose one with a scent you like!

Nars Orgasm Blush ($30usd on Sephora, 0.16 oz)


This is perhaps what put Nars on the market and is a cult-favorite through and through. I have owned several Orgasm blushes, and if you wear makeup regularly, you'll know how hard it is to actually go through and finish a pan of blush. Nars Orgasm was the first high end blush (pre-makeup hoarding days) I ever owned, so it was a go-to for a long time for me. It is a nicely pigmented peachy-pink blush with a faint shimmer that is not really noticeable once applied. It's warmer toned, but flattering for many different skintones, which is perhaps why this was such a popular color. I have to admit I rarely reach for this blush these days. It leans more pink on my cheeks, and these days I prefer a slightly more muted blush look. A light hand will give a nice flush to the cheeks, and since developing more of a blush collection, I doubt I will run out of my current pan any time soon. At $30, I don't think you absolutely need this blush (do you absolutely need any blush??) but Nars' blushes are cult favorites for a reason. (Confession - this is the only blush from them I have ever owned but would wholeheartedly try another - Madly perhaps?) They have great pigmentation overall, and while not the most finely milled, do have a fairly nice formula.

Wow, this was a long post...! I'll stop here. I would love to hear what your thoughts are on some of these products and other "holy grail" products! Personally, it's nice to have any product work out well for me, whether highly raved about or not, and finding those hidden gems is another love of mine...Perhaps a topic for another post?

Thursday, February 12, 2015

Review: The Body Shop Camomile Sumptuous Cleansing Butter

Here and there I like to dabble in different sorts of skincare. Oils have been a hot item recently with a surge of various facial oils on the market as well as cleansing oils. I recently picked up The Body Shop's Camomile Sumptuous Cleansing Butter as I've been on the hunt for a one-step makeup remover/cleanser and was intrigued by some of the good reviews this product garnered. It retails for $15 USD for 2.7oz (76g), but The Body Shop often has sales so you could probably grab this guy for less. I was debating between this cleansing butter and their similarly named Camomile Cleansing Oil, but the lady in the store said the oil was a little more messy and was not as apt at removing waterproof eye makeup, which was one of the primary reasons I was interested in this type of product. 
Nice compact tin, easy to travel with

The product is a white, waxy substance that is soft and melts easily into the skin. The fragrance is a light, sweet floral scent that is nice - though I can't really vouch for it's "chamomile-ness" since I'm not sure what chamomile smells like. It's pleasant - and not overbearing at all. 


You rub your fingers in the product and gently massage onto your dry face to work the product in and it melts in smooth and quickly. I do spend some extra time working it into my eye area and have had no trouble with burning or irritation. Once massaged in, you rinse your face with warm water. I have been using this cleansing butter for about a week - I wear a full face pretty much every day - foundation, blush, contour, and waterproof mascara and eyeliner - and this stuff has been working to take it all off. After rinsing, my face feels clean, smooth, and (mostly) residue free. It also definitely removes waterproof eye makeup!  Some of the ones I use are exceptionally tough to remove - Maybelline Rocket, Maybelline Lash Sensational (review to come!), and Covergirl Lashblast, to name a few. I previously was using cotton rounds soaked with Neutrogena's Oil Free Makeup Remover  to remove my eye makeup, but found even that didn't remove my waterproof stuff all that well, not to mention the greasy residue it routinely left behind. 

Now - I said this left my face *mostly* residue free - I still feel a slight slip as I rinse my eye area, as if it were still ever so slightly greasy. If I am using the butter alone I sometimes still wipe my eyes with a cotton round doused in some Bioderma to "degrease" any residue left behind.  I have to be honest - I do usually cleanse again after using this cleansing butter with a face wash that contains AHA/BHA or Benzoyl peroxide, as that is my usual routine to help keep my spots at bay - but - you really don't need to double cleanse after using this balm. I have used it alone and my skin does feel soft and cleansed, even my eye area doesn't really feel like it has much there. So far, I haven't experienced any extra breakouts or increased congestion since using this balm. It feels really nice to massage it in and rinse it off. You have NO idea how annoying it is to me to have to hold cotton rounds to my eyeballs nightly in an attempt to undo all my warpaint, only to not even have all of it be removed! (I have tried a myriad of eye makeup removers which claim to remove waterproof stuff including Clinique Take the Day off, BiodermaLancome's Bifacil - probably the best but oh so pricey, and  Sonia Kashuk's Eye Makeup Remover -my least fave of the bunch.) I also didn't want to use these makeup removers for all over the face, so I would end up using them just for my eyes, and then washing the rest of my face with a face wash anyway. Sorry. That was a l o t of makeup remover complaining! Anyway, this cleansing butter has been really nice to use. There is no absolute need to double cleanse like I do - really -I just do anyway because I'm paranoid! At $15 it may not seem the most economical but a little goes a long way and I think you can definitely snag it on sale if you just keep an eye on their website. 

Let me know what your thoughts are and if you've tried the product! 

Sunday, February 8, 2015

Blue Apron vs Gobble Meal Delivery Review and Comparison

Many days I am at work anywhere from 10-14 hours, sometimes longer. The inclination after a tiring day for many of us is to snack incessantly on random goodies (guilty!) or to pick up less than healthy take out or just go out to eat. The idea of thinking up something to cook is certainly low on my list of things I want to do, much less go to the store to pick up groceries. Several of my friends turned me onto Blue Apron, which is a "meal delivery" service of sorts. Basically you sign up and they send you a box of ingredients once a week to make 3 meals that serve two people. They have weekly menus offering 5-6 different choices of dishes with vegetarian, and omnivore options. You fill out a quick survey specifying food preferences when you sign up and they send you some combination of 3 meals each week. There are options for 2 persons or a family plan, but no plans available for one person. The box they send includes all the items you need to make the meal, but you do have to wash and chop stuff. Blue Apron meals come together in 30-45 minutes depending on the recipe. 


Blue Apron: Sauteeing!

Blue Apron: Finished product! Korean Style Tteok: Spicy Pork Ragu with Gai Lan


Blue Apron: Banana Leaf Steamed Cod with Spiced Rice, Yu Choy and Coconut


This differs from Gobble -where they boast 10 minute meals, one pan, and minimal-no food preparation. 


Everything is nicely packaged and there are ice packs in there to keep everything fresh and cold.

Meals are individually packaged with Gobble - very convenient.


That's my problem with Gobble...it feels more like food assembly than cooking to me since many components of the recipe are already prepared/pre-cooked. I also feel the dishes Blue Apron sent resulted in restaurant quality meals (see my pictures above) while Gobble meals seemed more like frozen meal quality. Unfortunately I don't have any pictures of our Gobble meals to show. I received one set of meals from each service prior to this review. The other nice thing is that both services send you free invites to give your friends to try their service after subscribing for a while. You have the option with both programs to skip weeks - you can do this ahead of time, and you can always unskip weeks as well. You can easily sign up, receive a week of recipes, and skip the next few weeks to see if you like the service. If you do this, you can preview the next week's menu of recipes with Blue Apron; with Gobble only as the upcoming week approaches do they send you an email notifying you of the coming meals -and then you can unskip the next week if there are recipes you are interested in. Of course, you can just opt to receive meals and be surprised when your delivery comes!    

Oh! I almost forgot to talk about the pricing. Both are reasonably priced. Blue Apron is $59.94 for 2 persons/3 meals ($9.99 per person per meal) with free shipping. The Family plan is for 4 people and you have either a 2 or 4 meal option at $8.74 per person per meal. Gobble is $11.95 per person, so for 2 persons/3 meals it comes to $71.70, and for 4 people/3 meals $143.40 - I'm guessing the higher price is because more of the recipe is done for you. These prices include the tax/shipping so the $59.94 is the total price you pay per week with Blue Apron and the same for $71.70 with Gobble. While it may not seem as cost effective as you buying all the ingredients for a recipe at the grocery store - there is a lot less if any food waste. I know many times I've tossed bunches of dried out parsley, or unused celery among other unused and spoiled produce after cooking. It seems so wasteful to me and money down the drain in reality just the same. 

Overall, I think these are great services for the busy person who still wants the satisfaction of a great tasting home cooked meal. It would be nice if there was an option for a single person I think, but the prices are reasonable for two, and if you don't have someone to eat the second meal, the food is good enough that you won't mind eating the other portion as well! On that note - the portion sizes are good and you will definitely be full. Trust me, I'm an eater! After trying both services, I definitely think Blue Apron is the better program. Their websites are very similar but Blue Apron's is better, and I really like that you can preview the menus with Blue Apron. These services take the guesswork out of meal planning which for me, is hugely helpful, and their recipes are quite inventive. 

I really think you would enjoy at least trying one of these programs - Gobble currently only delivers to California and Nevada, while Blue Apron delivers to most states. I would love to hear you what you guys think! Leave me a comment with your thoughts.     

Friday, January 30, 2015

Nars All Day Luminous Weightless Foundation Review

Welcome to my first blogpost! I've been reading beauty blogs and watching YouTube videos for years and thought I'd contribute to this amazing community. This is my review on Nars' newest liquid foundation the All Day Luminous Weightless Foundation. I had heard several glowing reviews and was very interested in trying this new guy out. 


My skin: Normal/Combo - T-zone will get a little oily throughout the day, normal cheeks otherwise

One pump of this foundation is probably about half a regular pump of foundation quantity wise. Nars claims one pump is sufficient to cover your entire face but I found the coverage on one pump with a beauty blender to be a very light coverage. 2 pumps definitely builds to a medium coverage - it definitely evened out my redness but you will still need a concealer if you have very dark undereyes or blemishes/freckles you want concealed. The foundation is quite watery and you have to shake the bottle prior to application. The finish is somewhat dewy and definitely not matte. I felt the foundation looked pretty natural from a distance - but up close you can definitely tell you are wearing makeup. I set the foundation with a powder as I do with any liquid foundation but found that it did transfer with touching or rubbing my face. I wore it for about 12 hours and by the end of the day there was definite wear - around my nose you could see redness peeking through and over the course of the day I did find myself feeling like I was "wearing the foundation". I don't get super oily, but this foundation did not control any of my oiliness at all.  


Bare skin. 
One pump applied with damp beauty blender. No powder. Natural light.  

Two pumps.

Three pumps. 
Nars All Day Luminous Weightless Foundation in Barcelona (left), MAC Pro longwear concealer in NC35 (right) for comparison.


All in all, I thought this was a fairly nice foundation. It definitely gave a luminosity to the face, but I was disappointed it did not look more natural at the coverage level I had hoped for. Color-wise, I just came back from vacation and got a little more color, so I felt the color match was decent. The Barcelona shade I got leans on the peachy side, as you can see from the picture above compared to MAC pro long-wear concealer in NC35. I don't believe it wears for 16 hours, and I think that if you're oily, this will start feeling pretty slick over the course of the day without touch-ups. I work long days and do not have time to touch up my makeup at all. Further, the transfer factor was rather annoying and I think you will have to be careful if you're hugging someone or touching your face and then your clothing. 

Overall, I'm not sure if this is a keeper for its $48 USD pricetag. Let me know your thoughts! Also, bear with me as I learn how to do this blogging thing!